Culture
Heave DIY: Jarring Situation
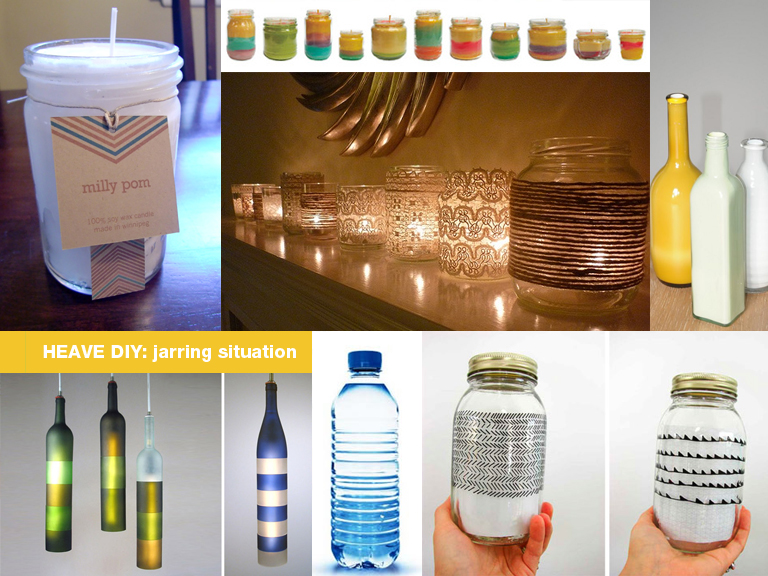
Each week in Heave DIY, Seetha Sankaranarayan journeys into the depths of her junk drawer to refashion old items into on-trend accessories, with minimal tools required.
Visualize: The lights are low. The Charles Shaw is poured. That honey from the bar uptown is wrapped around you on the couch, and you are poised to make your move. Feeling courageous, you tip her back for a dramatic Hollywood kiss. Suddenly, you smell something burning. Her hair! You numbskull, you’ve placed a bare tea light on the end table. Nothing sets the mood like setting your date’s luscious locks ablaze. To add insult to injury, she gets up in a huff, proclaiming that she’s never coming back to your tasteless, glorified shoebox–ahem, apartment.
Prove your vintage-inspired, eco-conscious style (and keep exposed flames in check) with a candle jar, which you can make with the following materials:
-a glass jar
-acrylic paint
-a paintbrush
-masking tape
-scissors
-a disposable cup

Time: 2+ hours
1) All traces of the label and whatever condiment the jar held previously must be removed. There are two ways to do this. With a dishwasher: Peel off as much of the label as possible, rinse the jar thoroughly and then run it through a wash cycle. Without a dishwasher: Soak the jar in warm, soapy water for about 20 minutes. After that, any residue should come off easily with a kitchen sponge.

2) Dry the jar and lid thoroughly, inside and out. Fill the disposable cup with warm water to clean your paintbrush. Select the paint colors you wish to use.

3) Unroll the masking tape and wrap it around the lower half of the jar, pulling it taut. To create the straightest line possible, do not cut the tape until you have wrapped all the way around the jar. Wrap another piece of tape an inch or so above this one to create a line.

4) Paint between the lines of tape. Paint the lid, unless you want it to say “Refrigerate after opening.” If you want to paint a bright color onto a black lid, apply a coat of white paint first to make that color show more vibrantly. You’ll have to wait at least half an hour before applying a second coat of paint. Use this time to apologize to your sweetheart for burning her hair, and tell her everything you’re learning about minimal aesthetics.

5) Give the jar and the lid at least an hour to dry completely after applying the second coat. More time is ideal, because if the coat isn’t dry when you peel up the tape, the paint will peel up with it.

6) When you are sure that the paint will not smudge or transfer, pop in a candle and light it. Quick trick: To snuff a candle without blowing it out and sending smoke all over the room, simply put the lid on the jar. Without air, the flame will exhaust itself.

Variations
a) Experiment with tape placement to create multiple lines or different shapes on the jar, like squares and triangles.

b) Apply different colors of paint over a wide area of the jar to create a warm, colorful glow when the candle is lit. I took a few art classes, but I’m no painting pro. Fortunately, stippling is for dummies. Dip your brush straight into paint and blot it by dabbing until the bristles begin to flare out. Using that same technique, paint the jar with staccato dabs.

Even if candles aren’t your style, this project has myriad possibilities. A tall pasta sauce jar can become a bright addition to your desk as a holder for pens and pencils. A small mustard bottle is perfect for cotton balls and other bathroom items.
[…] bottle opener, your phone rings. You completely forgot about your plans to buy dinner for the cutie whose hair you set on fire a few weeks ago. If you can’t pull yourself together and get to the restaurant in five minutes, […]
[…] 22, 2012: “Heave DIY: Jarring Situation” Painting empty condiment jars to use as candle […]
[…] aim to create a balance of gal-oriented and dude-friendly pieces, because I truly believe that personalization and customization are […]