Culture
Heave DIY: “Green” Gift Wrap
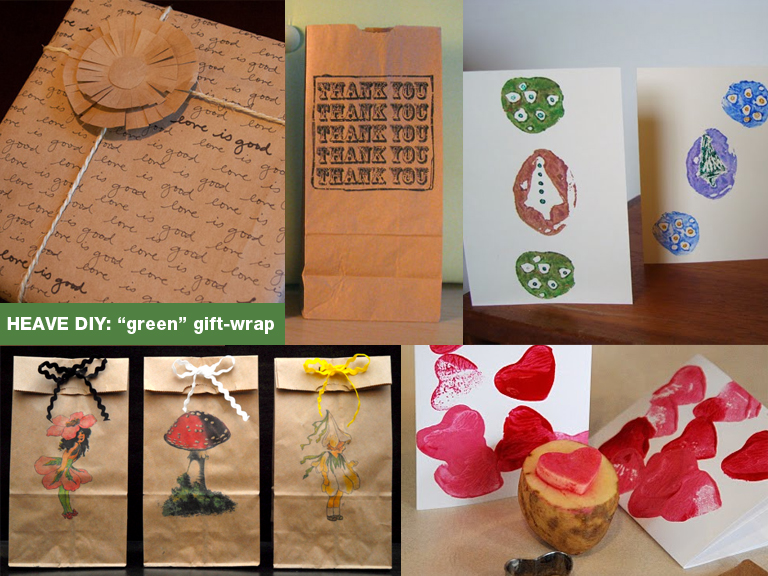
Each week in Heave DIY, Seetha Sankaranarayan journeys into the depths of her junk drawer to refashion old items into on-trend accessories, with minimal tools required.
In the early 2000s, stretchy fabric one-size-fits-all fabric book covers were the things to have. They came in myriad gaudy prints and colors, and all the cool kids used them to protect their hardcover texts. I was not one of those kids.
I wrapped my textbooks in brown paper grocery bags, using the same technique my father did as a child to achieve crisp surfaces and perfect corners. While my book covers were plain, I loved that they were environmentally friendly and easy to personalize–not to mention free with our weekly groceries. The stiff, durable paper could withstand the sharp point of my ever-doodling pen and the daily jostling in my backpack.
If you ever find yourself without a gift bag or fancy paper, you can hark back to childhood techniques to create printed brown paper gift-wrap with the following materials:
-a brown paper grocery bag
-scissors
-a potato
-a sharp vegetable knife
-poster paint or acrylic paint
-scotch tape

Time: 35 minutes, plus drying time
1) Open the bag. Cut vertically down one side, following the fold running down the middle. Cut out the bottom of the bag and set it aside.

2) Carefully peel off the handles and set them aside. Use a knife to separate the paper, if necessary.

3) Cut the potato in half. Lightly trace a geometric shape onto each face. These will become your stamps. If you make a mistake, simply cut off a slice and start fresh. When you have created the desired shape, cut down 1/2” into the face. Cut sideways through the skin to remove surrounding pieces of potato and create a raised stamp. Save the scraps for an omelet.

4) Blot the stamps against the bottom of the paper bag to remove moisture. Use this piece of paper as a plate to pour paint onto. Smooth out the remaining paper, plain side up. Dip the stamps, blot them, and press them against the paper. You can create different patterns by rotating the potatoes and repeating certain designs. Embrace mistakes – they add character.

5) Give the paper at least 30 minutes to dry before wrapping your gift. Tape the bag handles to the top of the package. If the gift is heavy, use glue or staples to keep the handle attached. Adorn the package with a strip of curling ribbon.

Variations
Simplify this project by springing for a couple simple stamps and inkpads. Ink dries faster than paint, making it ideal for personalizing brown paper and stationary in a pinch.

[…] 12, 2012: “Heave DIY: ‘Green’ Gift Wrap” Potato-stamping paper grocery bags to use as […]