Culture
Heave DIY: Wrapped Up
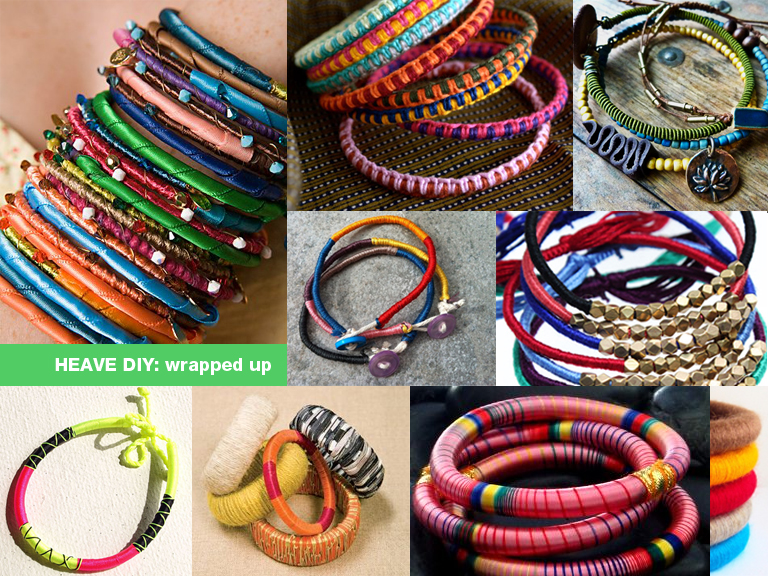
Each week in Heave DIY, Seetha Sankaranarayan journeys into the depths of her junk drawer to refashion old items into on-trend accessories, with minimal tools required.
Remember when practically every store in the mall started carrying destroyed denim, and people thought it was ludicrous to pay more for jeans that were already torn? I feel the same way about designers who push jewelry inspired by the friendship bracelets they wore as kids. I’m looking at you, Dannijo and Ettika. Looking at you and sobbing over the cobwebs in my wallet.
You don’t need to be a pro at chevron knots to pull off a basic cord wrapped bracelet, but you will need the following materials:
-several colors of embroidery floss
-a bangle or jelly bracelet
-scissors
-glue
-small beads and ribbon (optional)

Basic cord wrapped bracelet
Time: 30 minutes
A note before getting started: This project is dude-friendly. The average male’s wrist can’t accommodate a bangle, but jelly bracelets are flexible enough to fit. (Surely you still have one lying around from that awkward emo phase?) Hemp is a sturdier cord than the cotton traditionally used in friendship bracelets, and it can create a more masculine look.
1) Cut three or more pieces of cord, each at least 8-inch long. Begin by knotting one piece around the bangle or jelly bracelet. Cut the short end to 1/4-inch.

2) Spread a thin layer of glue on the bangle, covering about 1/2-inch at a time. Begin wrapping the free end of the cord around the bangle and the short end of the knot, creating a band of color as wide or as narrow as you like.

3) Knot the cord twice. Trim the excess to leave 1/2-inch.

4) Select a second color and knot it around the bangle and what is left of the first cord. Trim the excess of the first cord. Trim the short end of the second cord to 1/4-inch. You don’t necessarily have to trim these pieces, but doing so keeps the wrap from getting bulky where it begins.

5) Apply glue to the bangle and the short end of the knot. Wrap the free end of the cord around them.

6) Repeat Steps 3-5 until you reach the beginning of the first band of color. Tightly knot the cord you are working with twice. Guys, you can stop here and trim the excess. Gals, consider adding a couple beads to the end of the cord. Tie a knot to keep the beads in place, and then trim the excess.

Variations

Time: 40 minutes
a) Cut a 1.5-inch piece of ribbon. Apply glue to the knot where the first and last cords meet and wrap the ribbon around it. Secure the ribbon by tightly knotting a contrasting colored cord over it.

b) Use one continuous piece of cord to wrap the entire bracelet, stringing on small beads every so often. Be warned: You’ll need at least 3-feet of cord to make it halfway around a bangle, but the effect is still pretty neat if you tire of the process before wrapping the whole thing.

c) Knot together two cords of contrasting colors. Wrap one around the bangle and knot the end. Take the contrasting colored cord and widely wrap it over the first color. When you reach the end of the first band of color, continue wrapping the contrasting color to create a solid colored band. Repeat as desired.

Wear this bangle solo, or make a bunch to wear at once for some tasty arm candy. Happy stacking!

[…] 15, 2012: “Heave DIY: Wrapped Up” Breathing new life into old bangles by wrapping them in […]
[…] 15, 2012: “Heave DIY: Wrapped Up” Breathing new life into old bangles by wrapping them in […]